- Operating an e-commerce store has its benefits.
- However, managing taxes can be a daunting task, particularly for those who have never done it before.
- Thankfully, WooCommerce offers a simple setup process to help you accomplish this task efficiently and quickly.
- In this quick tutorial, we will delve deeper into how taxes function in WooCommerce and demonstrate how to set them up.
- There are basically 4 steps involved. Ready? Let's begin!
Step 1: Enable WooCommerce Taxes
- To get started, you’ll need to enable taxes for your store.
- In your WordPress dashboard, navigate to WooCommerce > Settings.
- Make sure that the General tab is selected, and look for the Enable taxes option:
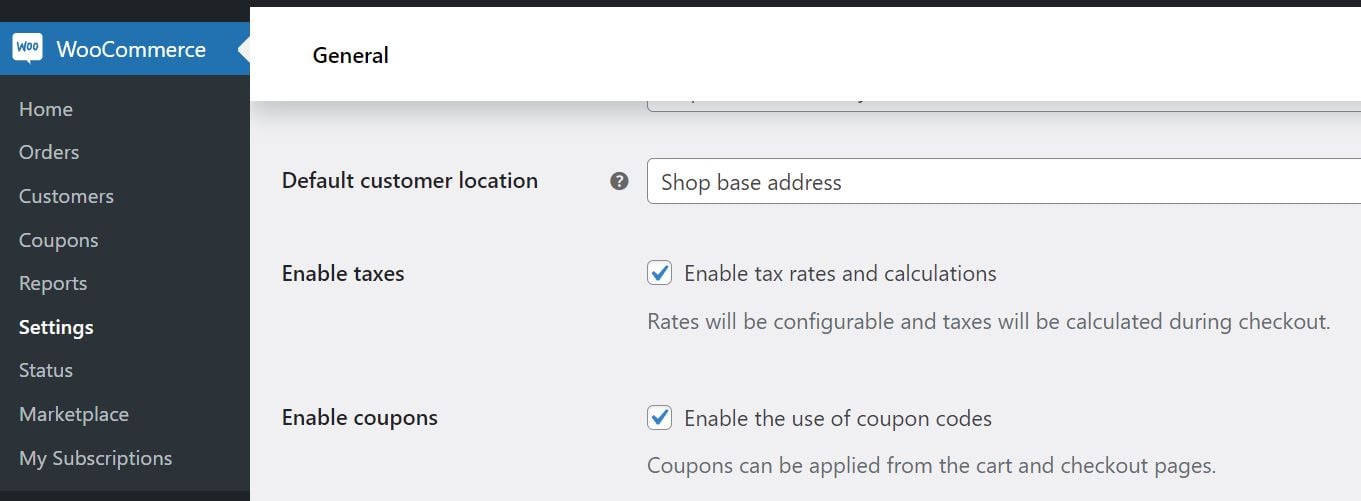
Check the accompanying box, and then click on the Save changes button. This will create a new tab for taxes in your WooCommerce settings.
Step 2: Configure Your Tax Settings
- You can now start configuring your tax options by heading to the newly-created Tax tab in the WooCommerce settings:
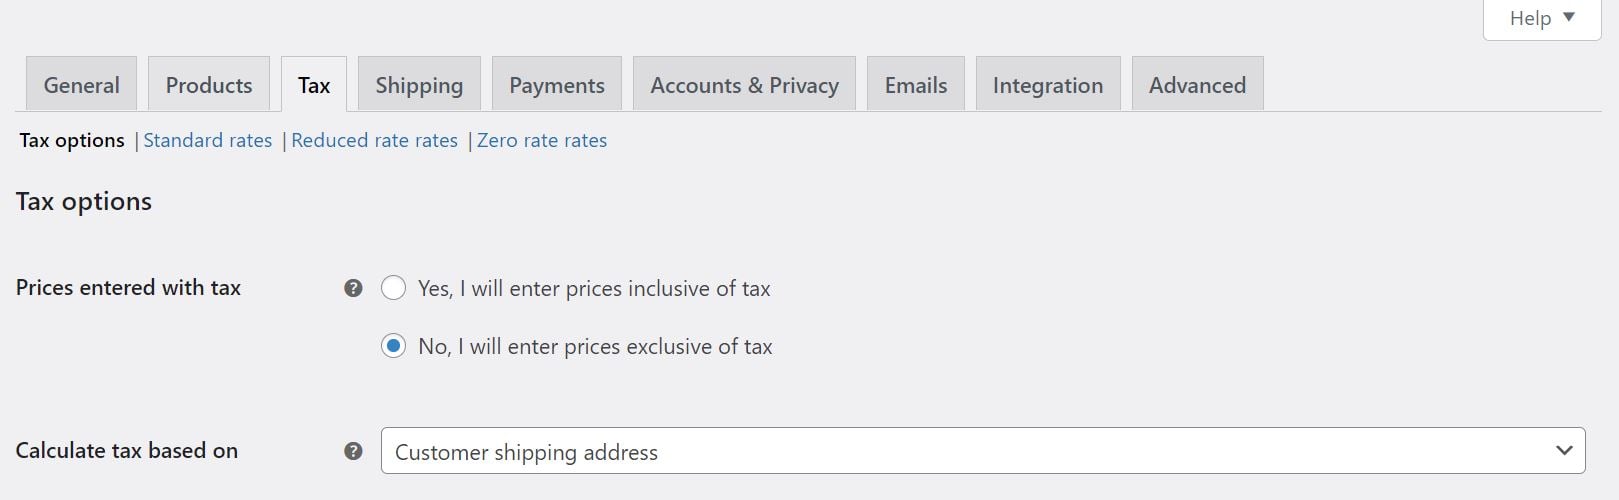
- First, you’ll need to decide whether you want product prices to be inclusive or exclusive of tax. If you opt for the latter, the taxes will be calculated and added to each user’s bill during checkout.
- Next, you can choose the location that you want tax calculations to be based on.
- Click on the drop-down menu and select one of the following options: Customer shipping address, Customer base address, or Shop base address.
- If you choose the third option, taxes will be based on your store’s location.
- You’ll also need to set the shipping class.
- Once again, you get a few options to choose from:

- By default, the shipping tax class is based on the items in the user’s cart.
- For instance, if a user buys an item that falls under a different tax rate, the shipping tax will be calculated at a similar rate.
- If this isn’t allowed in your tax jurisdiction, you can choose a different tax class.
- You can also enable tax rounding at the sub-total level, rather than per line:
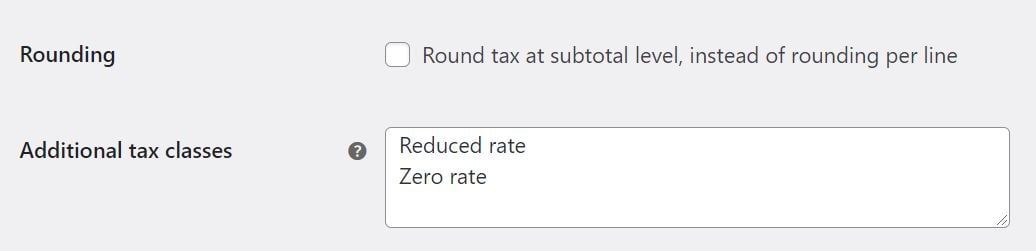
- WooCommerce also enables you to create new tax classes.
- Besides the default Standard Rate, you get two additional options: Reduced Rate and Zero Rate.
- To add another class, simply enter the name in the field (one class per line).
- Later on, we’ll show you how to fully set up additional tax rates in WooCommerce.
- Next, you can choose whether the product prices displayed on the front end of your store will be inclusive or exclusive of tax. You can also configure the same settings for prices displayed in the cart and during checkout:
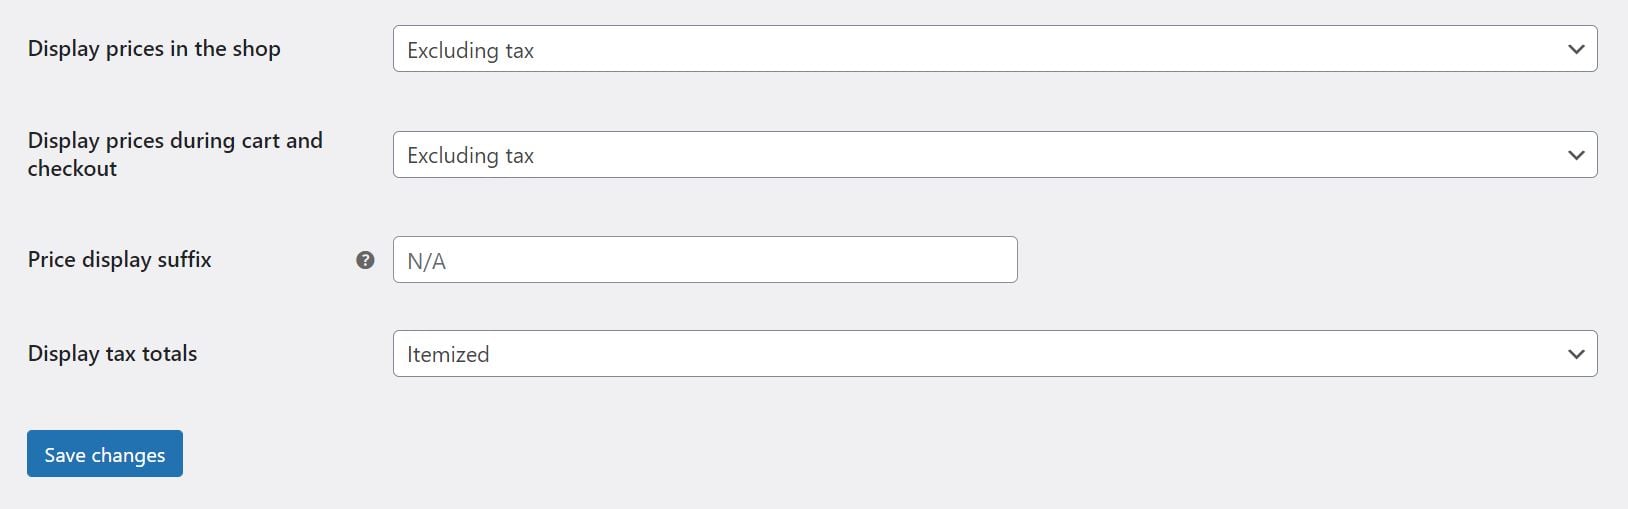
- Additionally, you can customize the text that will display alongside your product prices. This lets users know whether the price is inclusive or exclusive of tax. WooCommerce provides two placeholders for this purpose: {price_including_tax} and {price_excluding_tax}.
- Finally, you’ll see the Display tax totals option. This lets you choose whether you want multiple taxes to be displayed as a single total during checkout, or as an itemized list.
- That’s it! We’ve covered all the tax options available with WooCommerce.
- When you’re happy with your settings, click on the Save changes button at the bottom of the page.
Step 3: Set Up Tax Rates
- Earlier, we mentioned that WooCommerce comes with three types of tax classes: standard rate, reduced rate, and zero rates.
- We also showed you how to add a new tax class. Now, let’s look at how to set up tax rates for your store.
- In your tax settings, click on the tax class that you want to configure.
- For this tutorial, we’ll be working with Standard rates:
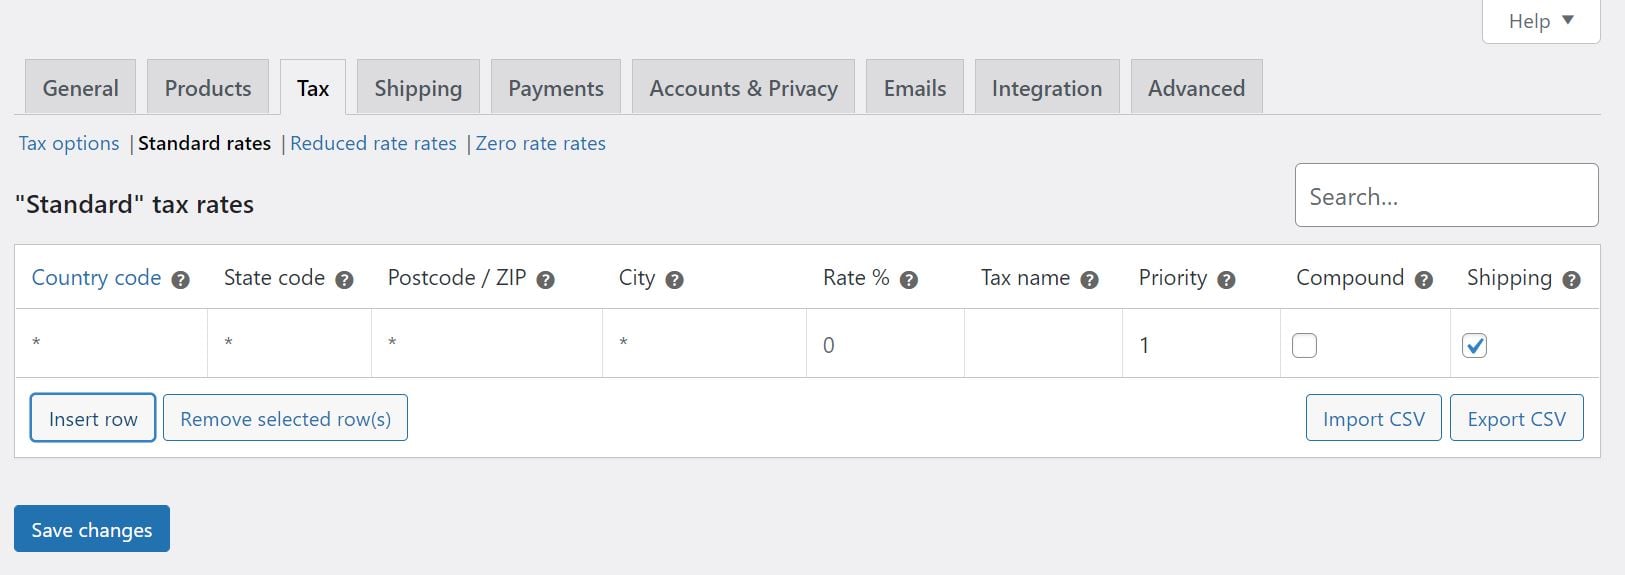
To add a new tax rate, click on the Insert row option. You’ll then be able to enter the relevant information in the available fields. Let’s look at the attributes for each tax rate:
- Country Code. Specify a 2-digit country code for the rate. You can use ISO 3166-1 alpha-2 codes to look up the official codes for each country. If you don’t want to specify a particular country, you can leave this field blank.
- State Code. Enter a 2-digit state code for the rate (where applicable). If you want to apply the rate to all states, you don’t need to enter a code.
- ZIP/Postcode. Enter postcodes for the rate. You can separate each code with a semi-colon (;), and use wildcards and ranges (e.g. you can enter “50” to apply the rate to all zip codes starting with those two digits).
- City. Specify the city (or cities) where this tax rate is applicable.
- Rate. Enter the tax rate, using four decimal places. For example, you’d enter “30.000” for a tax rate of 30%.
- Tax Name. Enter a name for your tax rate, such as “Sales Tax” or “VAT”.
- Priority. Choose a priority for this tax rate. Note that you can use one matching rate per priority. To define multiple tax rates for the same area, you’ll need to specify a different priority for each rate.
- Compound. Check this box if you want the rate to be applied on top of all other taxes.
- Shipping. Select this option if the rate applies to shipping charges.
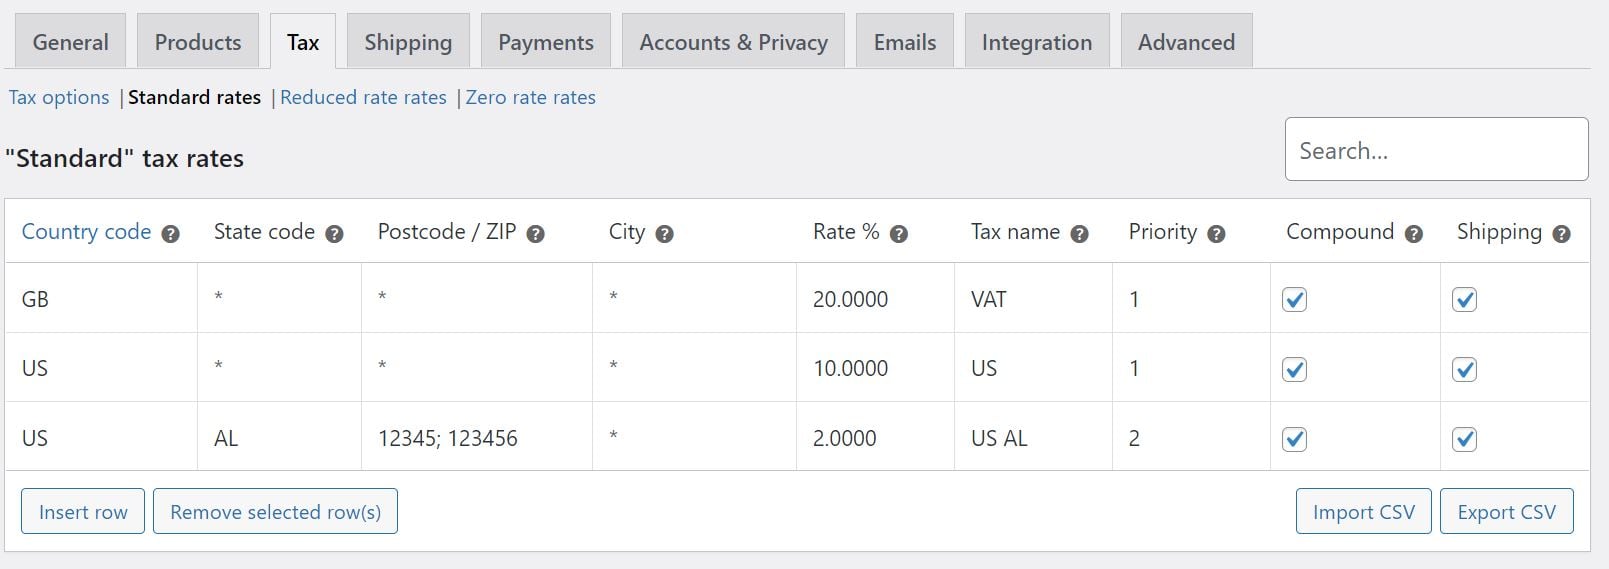
When you’re ready, click on Save changes. Here’s an example of a tax setup for a WooCommerce store:
- You can also import or export tax rates by clicking on the Import CSV or Export CSV button.
- If you want to delete a tax rate, simply select the relevant row and click on Remove selected row(s).
- Remember that you can also set up tax rates for your other tax classes: reduced rate and zero rate.
- You’ll just need to select the tax class from the top of the page.
Step 4: View Your Tax Reports
- Once you set up your taxes, you can access the tax reporting feature in WooCommerce. Go to WooCommerce > Reports > Taxes:
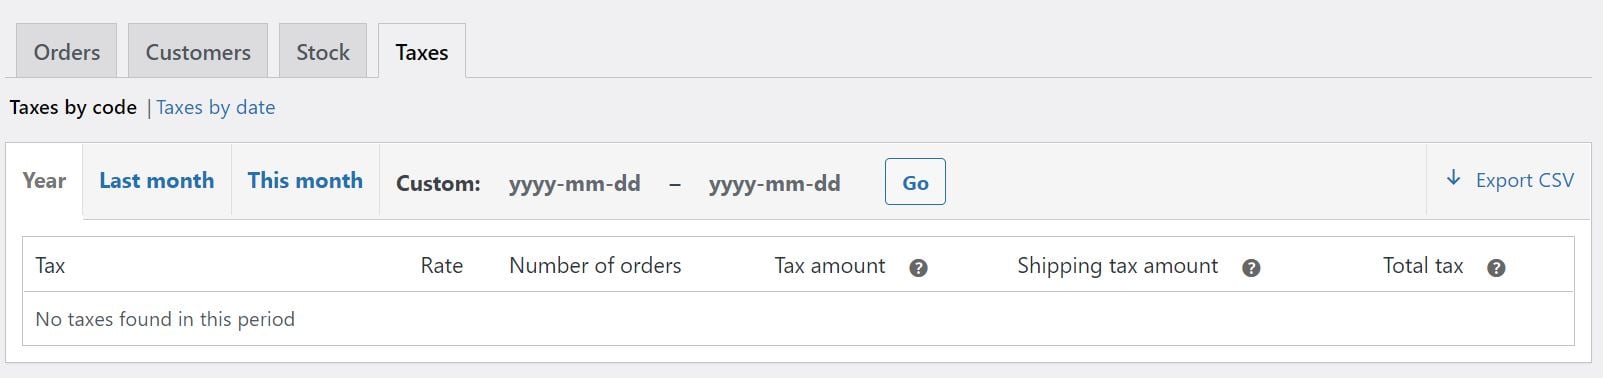
- If you select Taxes by date, you can view your tax reports based on the timeline you choose.
- Meanwhile, if you select Taxes by code, you’ll get access to data for each tax rate in your store.
Conclusion:
- Well done on successfully setting up your automated tax rates.
- However, it's important to note that the rules surrounding sales tax are ever-changing and it’s difficult to keep up.
- Thus, we encourage you to subscribe to our Mamanegent plan so we can take care of the whole setup process for you.
- We can assure you that your website will be able to collect the right taxes and file returns without missing a deadline.
