- Managing a website involves collaboration and teamwork, and we understand that you might not be the sole contributor to your web design project.
- That's why at Creative Yadley we allow you to easily add other users to your account, streamlining the process of working together seamlessly.
- In this short article, we'll guide you through the steps to invite and manage additional users, ensuring a smooth and efficient collaboration experience.
Adding Users:
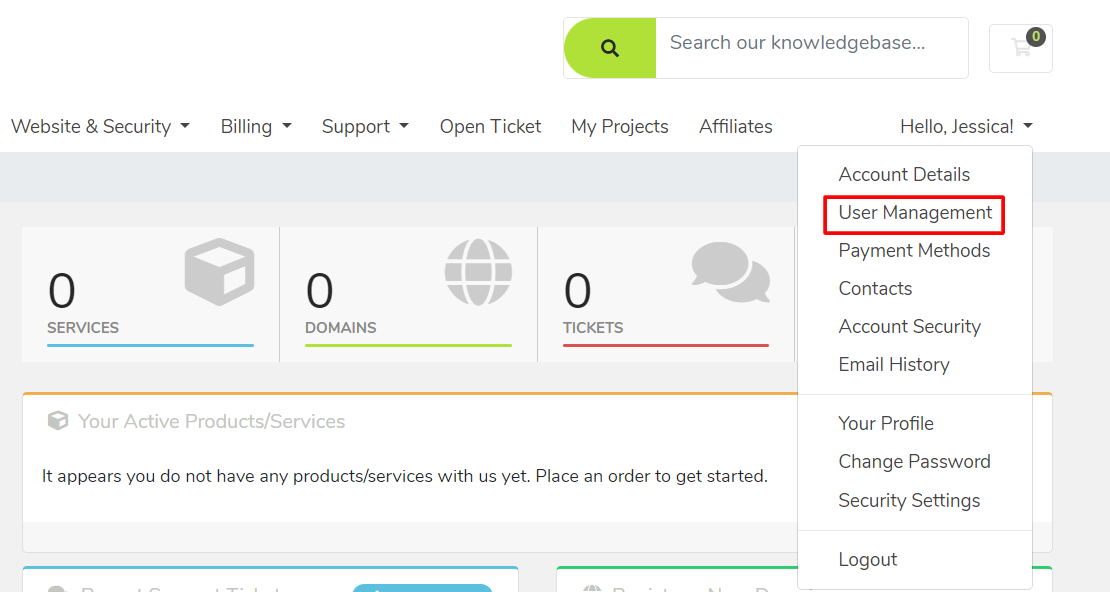
- Navigate to User Management:
Start by logging into your account and clicking on "Hello, Name!" in the top navigation bar. From the dropdown menu, select "User Management."
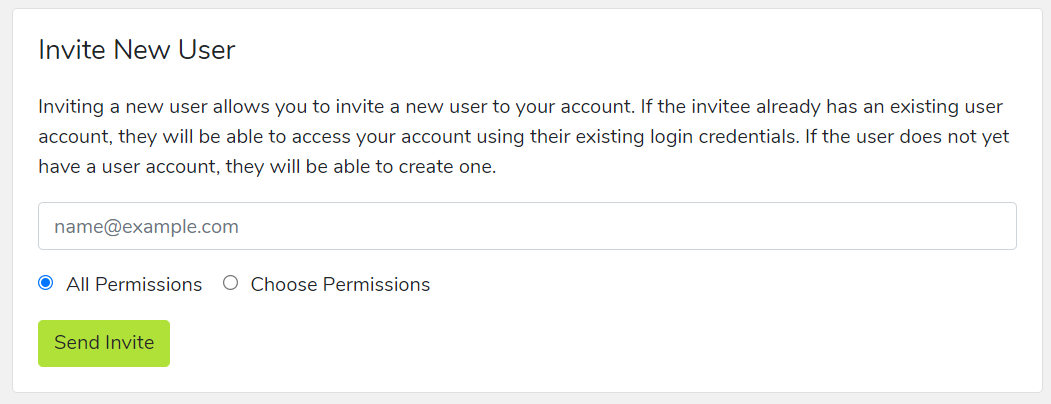
2. Invite New User:
Within the User Management section, locate the option to "Invite New User." Here, you will be prompted to enter the email address of the individual you wish to invite to your account.
3. Set Permissions:
Choose the level of access you want to grant to the new user. You can either provide them with "All Permissions" for comprehensive access, or opt for a more tailored approach by selecting specific permissions through the "Choose Permissions" option.
4. Send Invite:
Once you've configured the permissions, click "Send Invite" to dispatch an email invitation to the specified address. This email will contain instructions on how to join your account.
Common Use Cases:
1. Collaborative Design Efforts:
Adding team members, collaborators, or fellow designers to your account fosters a collaborative environment. This enables multiple contributors to work on the project simultaneously, speeding up the design process and ensuring a diversity of perspectives.
2. Client Access:
Granting clients access to your account allows them to stay informed about the project's progress, provide real-time feedback, and have a hands-on approach to the development of their website. This enhances transparency and client satisfaction.
3. Delegating Responsibilities:
If you have different individuals responsible for specific aspects of your website (e.g., content creation, SEO optimization, or social media management), assigning tailored permissions ensures that each team member can focus on their designated tasks.
Remember, if the individual you invite already has an account, they can seamlessly access your client account using their existing login credentials. For those without an existing account, the process is straightforward as they can create one during the invitation acceptance process.
Empower your web design journey by inviting the right individuals to contribute, collaborate, and achieve success together.
