- There are times when you may need to deactivate all your WordPress plugins, but you’re locked out of your WordPress admin area (wp-admin).
- This can be frustrating, especially when you're troubleshooting and need to deactivate plugins to identify the problem.
- In this quick tutorial, we'll walk you through two simple methods to deactivate your WordPress plugins even when you can't access the admin dashboard.
Why You Might Need to Deactivate Plugins
- Often, when troubleshooting WordPress, we advise you to deactivate all plugins and reactivate them one by one to pinpoint the issue.
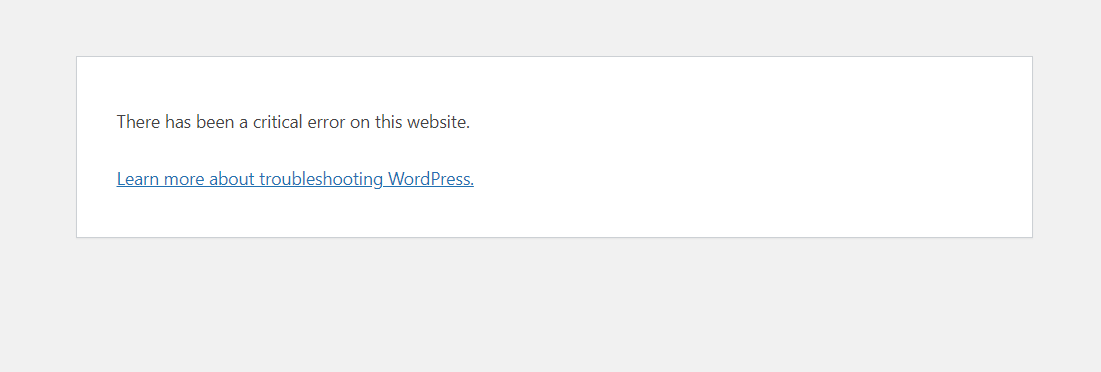
- This is mostly important when your website is experiencing a critical error or the dreaded 'white screen of death.'
- But what if you’re unable to access wp-admin to do this?
- That’s where these alternative methods come in handy. Let’s explore the options:
Method 1: Deactivate All Plugins Using cPanel
- This method involves accessing your website files directly through your hosting control panel (cPanel).
- Even if you’re new to web development, don’t worry — we’ll guide you through each step.
Step 1: Access Your Website via cPanel
- To get started, log into your cPanel.
- If you're unfamiliar with logging into your cPanel, here is our guide on the subject.
- Once logged in, locate the Files section, then click on File Manager.
- Next, navigate to the public_html directory (or the root folder where WordPress is installed).
- Inside, find and open the wp-content folder.
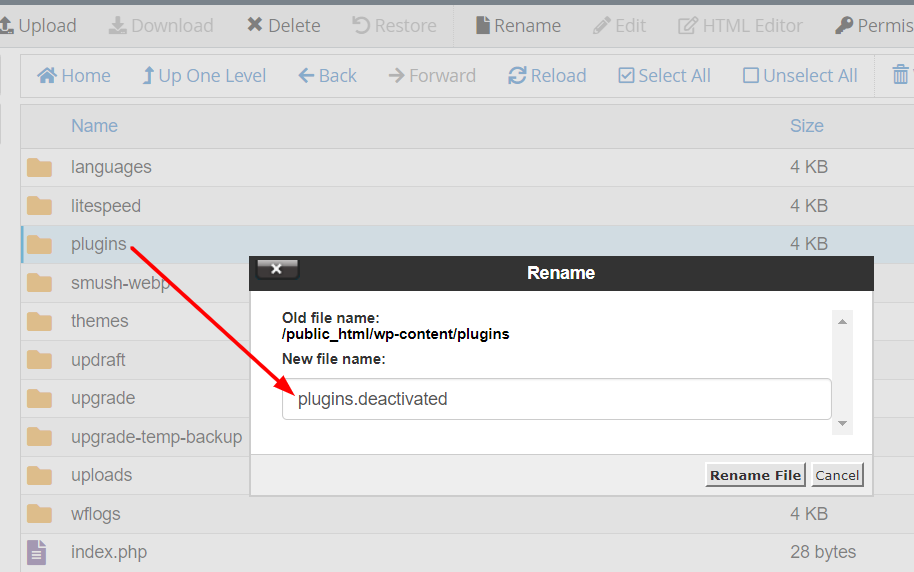
Step 2: Rename the Plugins Folder
- Inside the
wp-contentfolder, you’ll see a subfolder calledplugins. This is where WordPress stores all the plugins installed on your site. - Right-click on the plugins folder and select Rename. Change its name to something like
plugins.deactivated.
Step 3: What Happens Next?
- By renaming this folder, WordPress will no longer be able to locate your plugins, and as a result, it will deactivate all of them automatically.
- This happens because WordPress looks for a folder named
pluginsto load active plugins. - When it doesn’t find the folder, it disables them.
Step 4: Access Your Admin Area
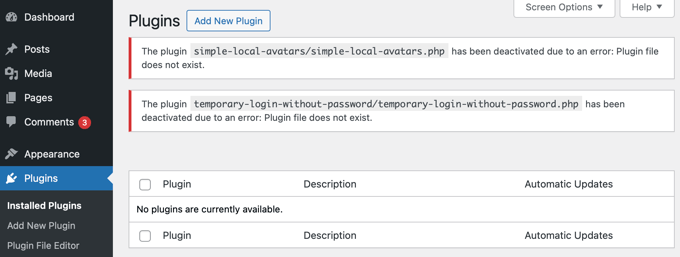
- Now, try accessing your WordPress admin area again. If the problem was caused by a plugin, you should now be able to log in.
- Once logged in, go to Plugins » Installed Plugins, where you’ll see notifications indicating that all your plugins have been deactivated.
Step 5: Reactivate Plugins One by One
- To restore your plugins, go back to cPanel, open File Manager, and navigate to the wp-content folder.
- Rename the plugins.deactivated folder back to plugins.
- Now, return to your WordPress admin area and go to Plugins » Installed Plugins.
- Reactivate your plugins one by one to identify the specific plugin causing the issue. If your site breaks again after activating a particular plugin, you’ll know which one is problematic.
- At this point, you can delete the problematic plugin’s folder via File Manager in cPanel, or reach out to the plugin developer for assistance.
Method 2: Deactivate Plugins Using phpMyAdmin
- If you're comfortable working with databases, phpMyAdmin offers another way to deactivate your plugins.
Important: Before proceeding, it's highly recommended that you make a complete backup of your database. This ensures you can restore your data if something goes wrong.
Step 1: Access phpMyAdmin
- Log in to your web hosting control panel (cPanel) and locate the phpMyAdmin option under the Databases section.
- Click on it to open phpMyAdmin in a new browser tab.

Step 2: Select Your WordPress Database
- Once phpMyAdmin is open, select your WordPress database from the list on the left-hand side.
- If you're not sure which database belongs to your WordPress site, check the
wp-config.phpfile in your site's root directory.
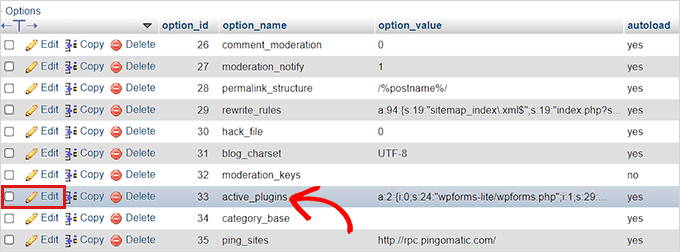
Step 3: Edit the ‘active_plugins’ Option
- Within your database, find and click on the wp_options table.
- Note: If your database uses a different table prefix, it might look something like
xyz_options.
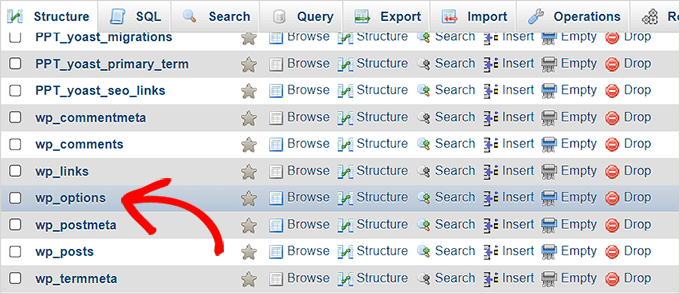
- Once inside the
wp_optionstable, scroll through the list until you find the active_plugins row. - Click the Edit link next to it.
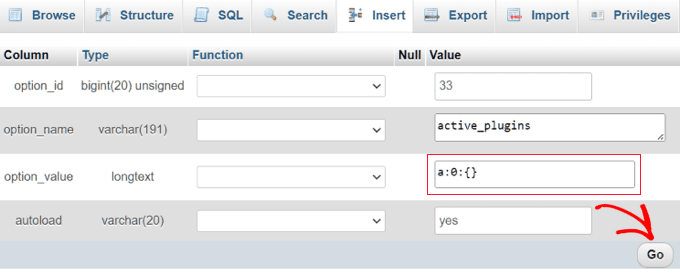
Step 4: Reset Active Plugins
- In the
option_valuefield, replace the existing code witha:0:{} - This will reset all active plugins to an empty array, effectively deactivating them.
- After making this change, click Go to save.
Step 5: Log In to Your Admin Area
- Now that all plugins are deactivated, attempt to log in to your WordPress admin area.
- If a plugin was the cause of the issue, you should now have access.
Conclusion
- Whether you're troubleshooting a plugin conflict or locked out of your WordPress dashboard, deactivating your plugins via FTP or phpMyAdmin can save the day.
- Once you’ve pinpointed the problematic plugin, you can either remove it or seek support from its developer.
- Remember, always back up your site and database before making changes like these. This ensures your site remains safe, even if something goes wrong during the process.
