Images play a vital role in web design, so you will most likely use the Image Widget a lot while designing your website.
1. How To Replace A Current Image
- To replace a pre-existing image, simply click on it
- The image editor panel will automatically open on the left
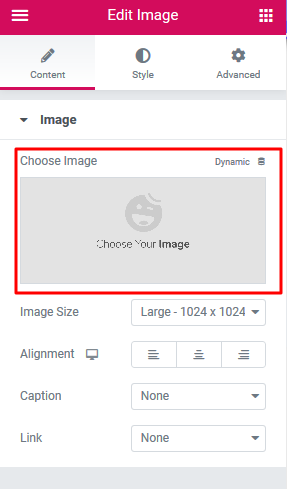
- Click on the image in the editor panel to select a new one from your media library or to upload a new one from your computer

Image Style Tab

- Width: Set the width of the image
- Max Width: Set the maximum width of the image as a percentage
- Opacity: Control the opacity of the image
- CSS Filters: Adjust the image style by changing the CSS Filter scales for Blur, Brightness, Contrast, Saturation, and Hue settings
- Border Type: Select the type of border
- Border Radius: Set the border-radius to control corner roundness
- Box Shadow: Adjust box-shadow options
When setting the Hover state, two new options appear:
- Transition Duration: Set the duration time in milliseconds for the hover effect
- Hover Animation: Choose the hover animation for the image
2. How To Add A New Image From Scratch
- To add an image to any section, simply drag the image widget from the editor panel and drop it where you want your image to show
Click on 'Choose Image' to select a new image from your media library or from your computer

Now that your image is now where you want it to be, let`s look at some of the settings you can give to the image:

Content
-
Image - Upload an image or choose Dynamic to dynamically use Posts featured image, Site Logo, and Author Profile Picture.
-
Image Size - Choose the size of the image
-
Alignment - Set the image Alignment
-
Caption - Add a caption to the bottom of the image.
-
Link To - Set a link to a URL, media file or no link.
Style
-
Width - Set the Image Width
-
Max Width - Set the Max Width for the Image
-
Hover Animation - Click the dropdown to choose a Hover Animation
-
CSS Filters - Set CSS Filters: Blur, Brightness, Contrast and Saturation
-
Opacity - Set the Opacity
-
Transition Duration - Set the Hover Animation duration
-
Border Type - Set a Border Type
-
Border Radius - Set a Border Radius
-
Box Shadow - Set Box Shadow: Horizontal, Vertical, Blur, and Spread
-
Caption - Set the Alignment, Text color, Text Shadow, and Typography of the caption.
Note: Blend Modes/CSS Filters do not work with Internet Explorer.

